 Save
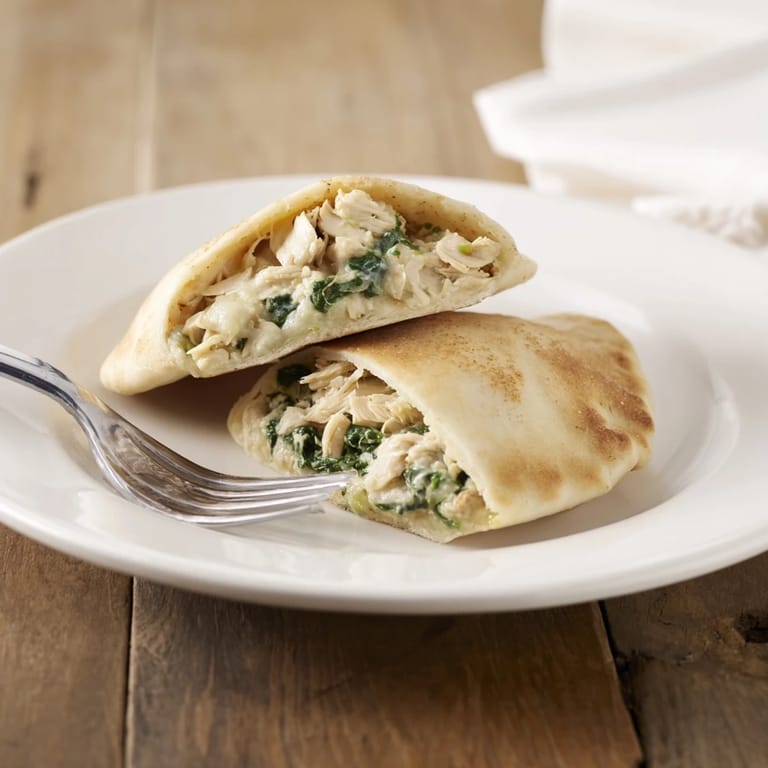
Save The smell of garlic and melted cheese pulled my husband into the kitchen before I even called him for dinner. I was experimenting with leftover rotisserie chicken and a random jar of artichoke hearts I'd been meaning to use. What started as a fridge cleanout turned into one of our most requested weeknight meals. Now, every time I make these stuffed pitas, he hovers near the oven waiting for that first bite.
I brought these to a potluck once, still warm in foil, and watched them disappear in minutes. A friend cornered me near the dessert table demanding the recipe, convinced I'd ordered them from some hidden Mediterranean cafe. The truth is, they come together so fast I almost felt guilty taking credit. But that's the beauty of simple ingredients that just work together.
Ingredients
- Cooked chicken breast, diced or shredded (2 cups): Rotisserie chicken is your best friend here, it adds extra flavor and saves you 20 minutes of poaching and shredding.
- Canned artichoke hearts, drained and chopped (1 cup): Make sure to squeeze out the excess liquid or your filling will get watery, I learned that the messy way.
- Fresh spinach, chopped (1 cup): Fresh works best for texture, but frozen works in a pinch if you thaw and drain it really well.
- Greek yogurt (1/2 cup): This keeps the filling creamy and tangy without being as heavy as sour cream, plus it adds protein.
- Light mayonnaise (1/4 cup): It binds everything together and adds a subtle richness that balances the yogurt.
- Shredded mozzarella cheese (1/2 cup): Melts beautifully and gives you those irresistible cheese pulls when you bite in.
- Grated Parmesan cheese (1/4 cup): Adds a nutty, salty depth that makes the filling taste more complex than it really is.
- Garlic, minced (1 clove): Fresh garlic makes all the difference, the jarred stuff just doesn't have the same punch.
- Onion powder (1/2 teaspoon): A quiet background player that rounds out the savory notes.
- Dried oregano (1/2 teaspoon): Brings that Mediterranean vibe without overwhelming the creamy filling.
- Crushed red pepper flakes (1/4 teaspoon, optional): Just a pinch adds warmth and a tiny kick, but skip it if you're serving kids.
- Salt and black pepper: Taste as you go, the cheeses are salty so you might need less than you think.
- Large pita breads (4, whole wheat or regular): Look for pitas that are soft and pliable, stale ones will crack when you try to stuff them.
- Fresh parsley, chopped (optional): A bright garnish that makes the dish look like you put in way more effort.
- Lemon wedges (optional): A squeeze of lemon right before eating wakes up all the flavors.
Tired of Takeout? 🥡
Get 10 meals you can make faster than delivery arrives. Seriously.
One email. No spam. Unsubscribe anytime.
Instructions
- Preheat and Prep:
- Set your oven to 375°F and line a baking sheet with parchment paper. This prevents sticking and makes cleanup almost nonexistent.
- Mix the Filling:
- In a large bowl, combine the chicken, artichokes, spinach, Greek yogurt, mayonnaise, both cheeses, garlic, onion powder, oregano, red pepper flakes, salt, and pepper. Stir until everything is evenly coated and creamy, it should look like a chunky, cheesy dip.
- Prepare the Pitas:
- Slice each pita in half to create two pockets. If your pitas are a little stiff, warm them in the microwave for 10 seconds to make them easier to open without tearing.
- Stuff Generously:
- Spoon the filling into each pita half, packing it in but not so much that it bursts. You want a satisfying stuffed pocket, not a mess.
- Bake Until Golden:
- Arrange the stuffed pitas on your prepared baking sheet and bake for 15 to 20 minutes. The edges should be lightly toasted and the filling should be bubbling hot.
- Garnish and Serve:
- Pull them out of the oven, sprinkle with fresh parsley, and serve with lemon wedges on the side. Let them cool for a minute or two so you don't burn your mouth on molten cheese.
 Save
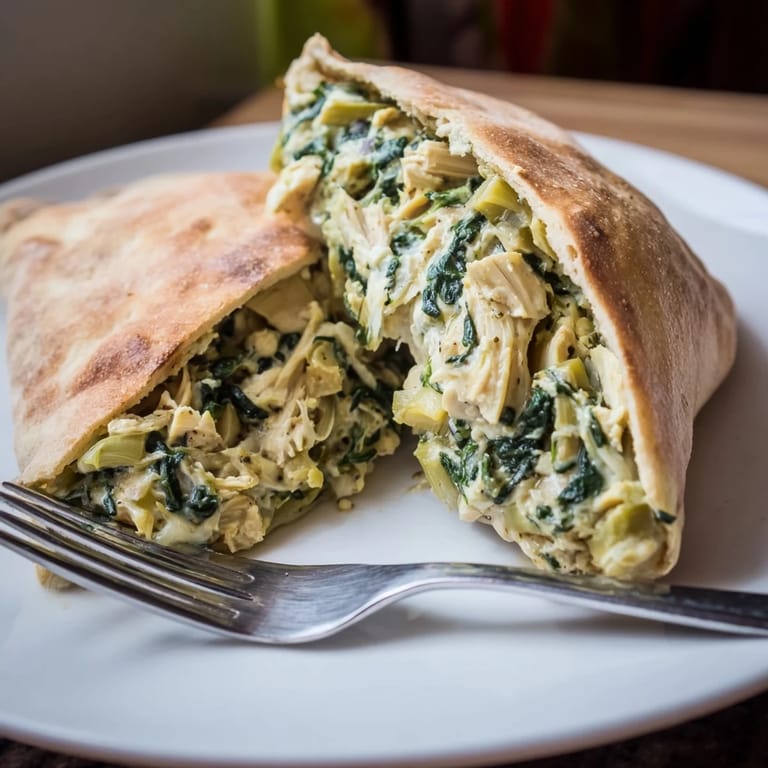
Save One evening, my daughter declared these better than pizza, which is high praise in our house. She started requesting them for her school lunches, and I'd pack them cold with a little container of lemon juice. Her friends were curious and a little jealous, which made her feel special. It's funny how a simple stuffed pita became her signature lunch.
Swaps and Variations
I've made this filling with cream cheese instead of Greek yogurt when I wanted something richer and more decadent. You can also toss in sun-dried tomatoes or roasted red peppers for extra color and a sweet, tangy layer. If you're out of pitas, spoon the filling into bell pepper halves or over baked sweet potatoes. Once, I used the filling as a dip at a party, served it warm with crackers and pita chips, and people couldn't stop going back for more.
Make Ahead and Storage
The filling can be made up to two days ahead and kept in the fridge in an airtight container. When you're ready to eat, just stuff the pitas and bake them fresh. Leftover stuffed pitas reheat surprisingly well in a 350°F oven for about 10 minutes, though they lose a little crispness. I don't recommend microwaving them, the pita gets chewy and the filling can separate. If you have extra filling and no pitas, spread it on toast or use it as a topping for baked chicken.
Serving Suggestions
These stuffed pitas feel like a complete meal on their own, but I love serving them with a simple arugula salad dressed in lemon and olive oil. The peppery greens cut through the richness of the filling. A side of tzatziki or hummus makes it feel even more Mediterranean, and it's great for dipping any pita that breaks apart. Sometimes I'll add a handful of cherry tomatoes and cucumber on the side for crunch and freshness.
- Pair with a crisp white wine or sparkling water with lemon for an easy weeknight dinner vibe.
- Double the batch and freeze unbaked stuffed pitas individually, then bake from frozen for an extra 10 minutes.
- Let guests build their own by setting out the filling, pitas, and toppings buffet style.
 Save
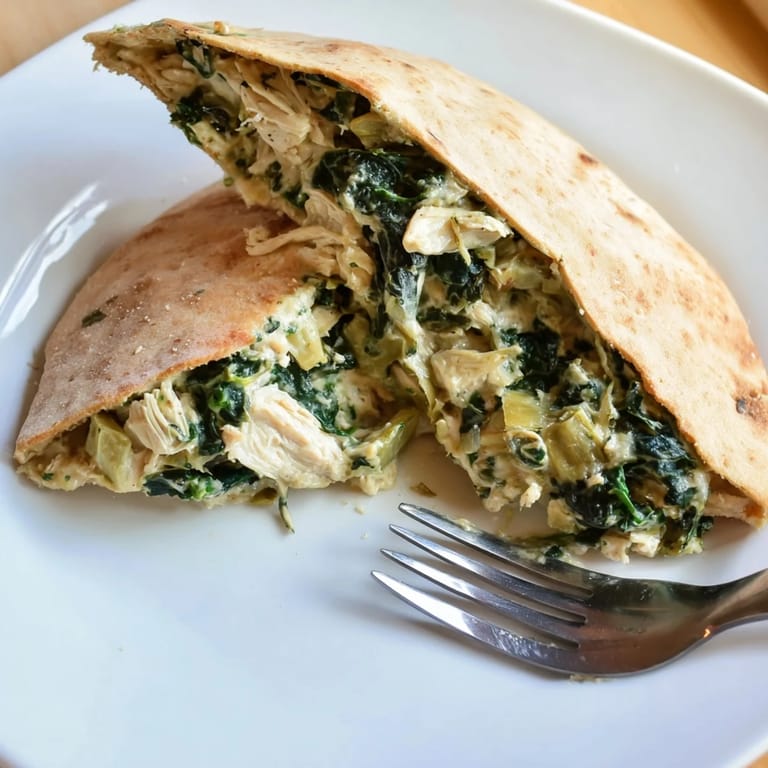
Save This recipe has become one of those reliable favorites that makes weeknight cooking feel less like a chore and more like a small win. I hope it becomes that for you too.
Recipe Q&A
- → Can I use rotisserie chicken for this dish?
Yes, rotisserie chicken works wonderfully and adds extra flavor. Simply shred it into bite-sized pieces before mixing with the other ingredients.
- → How do I store leftovers?
Store the filling separately from the pita in an airtight container in the refrigerator for up to 3 days. Reheat gently in the oven or microwave and stuff fresh pita when ready to serve.
- → Can I make this ahead of time?
Yes, prepare the filling up to 24 hours in advance and refrigerate it. Stuff and bake the pitas just before serving for the best texture and melted cheese.
- → What are good substitutes for Greek yogurt?
Cream cheese provides a richer filling, while sour cream or ricotta cheese are lighter alternatives. Adjust the amount based on your preferred consistency.
- → How can I add more vegetables?
Sun-dried tomatoes, roasted red peppers, diced bell peppers, or caramelized onions blend seamlessly into the mixture and enhance both flavor and nutrition.
- → Is this dish suitable for meal prep?
Absolutely. Prepare the filling in advance and portion into containers. Stuff pitas and bake fresh throughout the week, or freeze unbaked stuffed pitas for up to one month.