 Save
Save I pulled this cake from the oven on a rainy Saturday afternoon, and the whole house smelled like vanilla and butter. My niece had been obsessed with old cartoons all month, and when she saw the glossy black fondant curls draped over the frosting, she actually gasped. It was one of those moments where you realize a cake can be more than dessert. It felt like handing her a piece of animated magic on a plate.
The first time I made this, I was nervous about the fondant hair. I kept it simple, cutting a wavy silhouette with kitchen shears, and it worked. My friend took one look and said it reminded her of birthday parties from childhood. We ended up eating two slices each, laughing about how cartoons used to be so wonderfully weird.
Ingredients
- All-purpose flour: This gives the cake structure without weighing it down, and I always spoon it into the measuring cup instead of scooping to avoid dense layers.
- Granulated sugar: It creams beautifully with butter and helps create that tender crumb everyone loves.
- Baking powder: Fresh baking powder is key; I learned the hard way that old leavening means flat cakes.
- Unsalted butter: Room temperature butter blends smoothly and lets you control the salt level in the batter.
- Eggs: I let them sit out for twenty minutes so they incorporate without deflating the batter.
- Whole milk: The fat content keeps the cake moist, and I never skip it for skim.
- Vanilla extract: A good vanilla makes everything smell like a bakery, and I always use pure extract.
- Red gel food coloring: Gel colors give you that deep red without thinning the batter like liquid dyes do.
- Cream cheese: It must be soft or youll end up with lumps, so I leave it on the counter for an hour.
- Powdered sugar: Sifting it prevents gritty frosting and makes the buttercream fluffy.
- Black fondant: This is your hair, and rolling it thin keeps it pliable and easier to drape.
- White fondant: Perfect for those big cartoon eyes, and a little goes a long way.
- Red fondant: I use this for lips and tiny accents, and kneading it warm makes it easier to shape.
- Edible pearl dust: Optional, but it adds a subtle shimmer that catches the light beautifully.
- Cornstarch: Dusting your work surface with this stops fondant from sticking without adding extra sweetness.
Tired of Takeout? 🥡
Get 10 meals you can make faster than delivery arrives. Seriously.
One email. No spam. Unsubscribe anytime.
Instructions
- Prep the Pans:
- Preheat your oven to 350°F and grease two 8-inch round pans, then line them with parchment circles. This step saves you from heartbreak when the cake sticks.
- Mix the Dry Ingredients:
- Whisk together the flour, baking powder, and salt in a bowl and set it aside. Doing this first means you wont scramble later.
- Cream Butter and Sugar:
- Beat the butter and sugar on medium speed for about three minutes until the mixture looks pale and fluffy. This is where air gets trapped, giving you a light crumb.
- Add Eggs and Vanilla:
- Crack in the eggs one at a time, beating well after each, then stir in the vanilla. The batter should look smooth and glossy.
- Alternate Wet and Dry:
- With the mixer on low, add the flour mixture and milk in three parts, starting and ending with flour. Scrape the bowl between additions so nothing hides at the bottom.
- Color the Batter:
- Stir in the red gel food coloring until the batter turns a deep, even red. I use a spatula to check for streaks.
- Fill the Pans:
- Divide the batter evenly between the two pans and smooth the tops with a spatula. Tapping the pans on the counter releases air bubbles.
- Bake:
- Slide the pans into the oven and bake for 25 to 30 minutes, rotating them halfway through. A toothpick should come out clean when theyre done.
- Cool the Cakes:
- Let the cakes rest in their pans for ten minutes, then turn them out onto wire racks to cool completely. Patience here prevents crumbling.
- Make the Buttercream:
- Beat the cream cheese and butter together until smooth, about two minutes. Gradually add the powdered sugar, one cup at a time, then increase the speed and beat until fluffy.
- Level and Layer:
- Trim the domed tops off each cake with a serrated knife, then place one layer on a cake board and spread buttercream on top. Set the second layer gently on top.
- Crumb Coat:
- Spread a thin layer of buttercream all over the cake to trap crumbs, then chill it in the fridge for twenty minutes. This makes the final coat silky smooth.
- Final Frosting:
- Apply a generous coat of buttercream and smooth the sides and top with an offset spatula or scraper. Take your time; this is your canvas.
- Roll Black Fondant:
- Dust your work surface with cornstarch and roll the black fondant to about 1/8-inch thickness. Cut out Bettys hair silhouette using a template or freehand, then transfer it onto parchment.
- Shape the Eyes and Lips:
- Roll white fondant and cut two large circles for eyes and small hearts for highlights. Cut red lips from red fondant and dust everything with pearl dust if you like a little sparkle.
- Attach the Hair:
- Once the frosting is firm, drape the black fondant hair over the front of the cake and trim any excess at the base. A tiny dab of buttercream on the back helps it stick.
- Add Eyes and Lips:
- Press the white fondant eyes and red lips gently onto the cake, using buttercream as glue. Theyll stay put once the frosting sets.
- Create Eyelashes and Brows:
- Use extra black fondant to cut or pipe eyelashes and eyebrows, then position them around the eyes. Tweezers help with tiny pieces.
- Finish with Accents:
- Roll a thin coil of red fondant into a decorative headband and place it across the top edge of the hair. Add edible sparkles or a sugar flower around the base if you want extra flair.
- Rest Before Serving:
- Let the decorated cake sit at room temperature for thirty minutes so the fondant softens slightly. This makes slicing much easier.
 Save
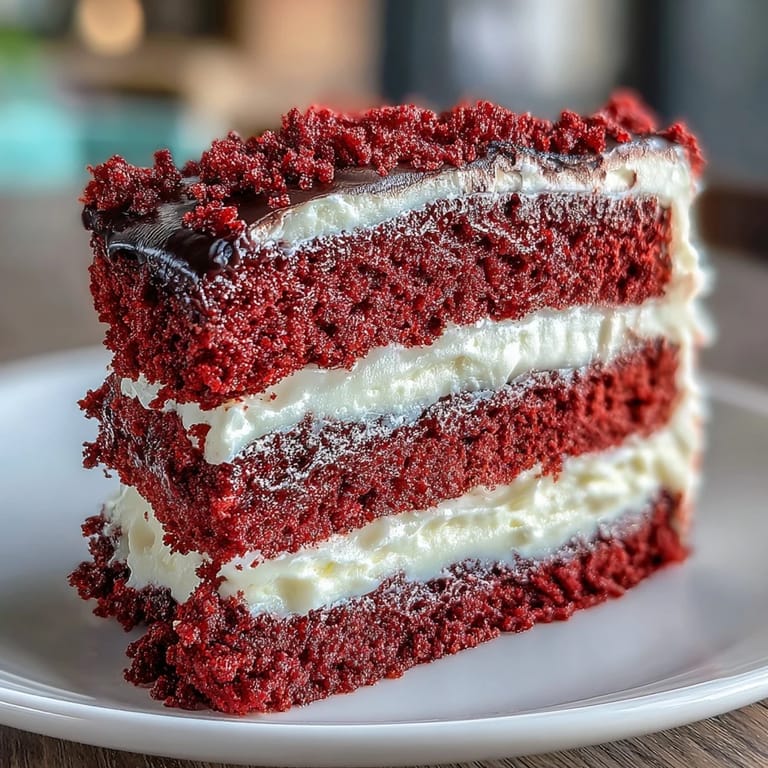
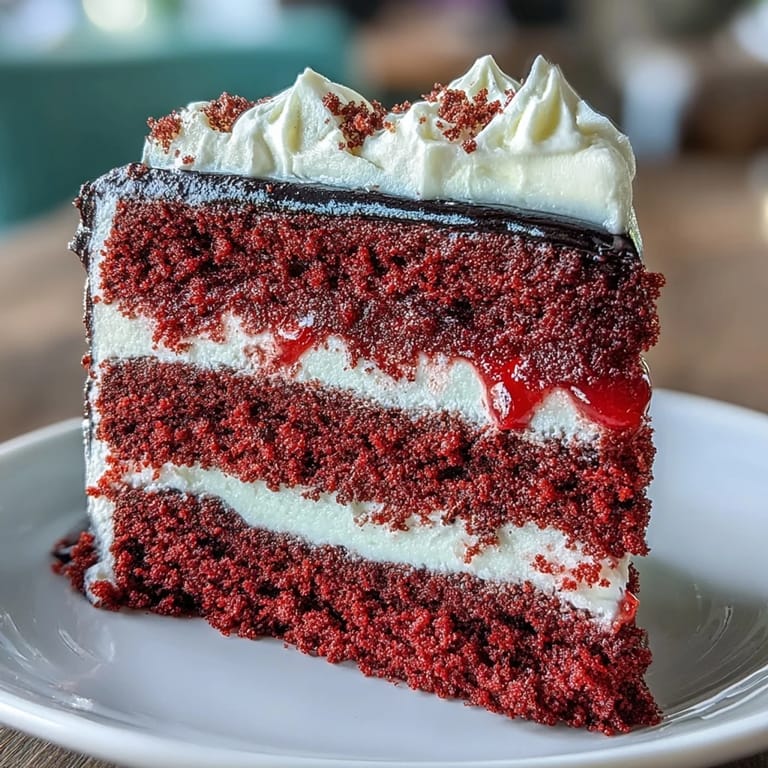
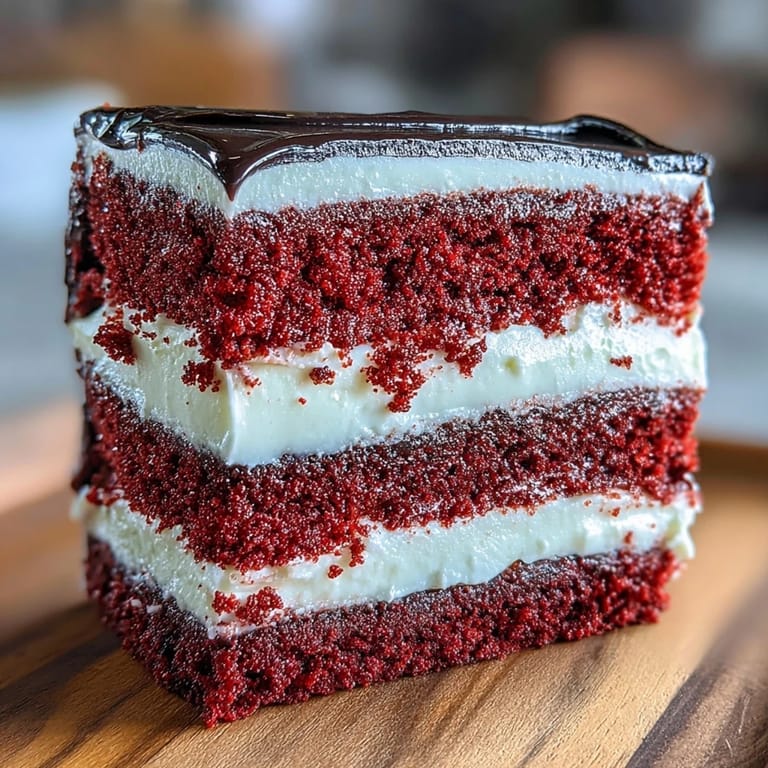
Save When I set this cake on the table, everyone went quiet for a second before someone laughed and said it looked too good to eat. We cut into it anyway, and the red layers against the white frosting made it feel like a celebration. That cake became the centerpiece of the afternoon, and I still get requests to make it again.
How to Get the Perfect Red Color
I used to be scared of gel food coloring, thinking a little would go a long way, but red needs confidence. Start with a tablespoon and mix it fully into the batter, then check the color under good light. If it looks pink instead of red, add another teaspoon. The color deepens slightly as it bakes, so aim for a shade just brighter than your final goal.
Working with Fondant Without Stress
Fondant intimidated me until I realized it behaves like playdough once you knead it warm. If it cracks while youre rolling, ball it up and start again; theres no penalty. I keep a small dish of cornstarch nearby to dust my hands and surface, and I roll between two sheets of parchment if Im worried about sticking. The hair silhouette doesnt have to be perfect; wobbly edges look artistic once theyre on the cake.
Storing and Serving Tips
This cake keeps beautifully in the fridge for up to four days, but I always let it come to room temperature before serving so the frosting softens. If youre transporting it, chill it first so the fondant firms up, then drive carefully. Leftovers can be frozen without the fondant decorations; just wrap slices tightly in plastic wrap and theyll stay moist for a month.
- Serve with fresh raspberries or strawberries for a tart contrast to the sweet frosting.
- A dollop of whipped cream on the side makes each slice feel even more indulgent.
- If kids are helping, let them shape the fondant eyes and lips; they love being part of the magic.
 Save
Save This cake taught me that baking can be playful, that fondant isnt as scary as it looks, and that a little cartoon charm goes a long way. I hope it brings as much joy to your kitchen as it did to mine.
Recipe Q&A
- → What skill level is needed for this Betty Boop cake?
This project requires advanced decorating skills, particularly for fondant work. You'll need experience with leveling layers, applying crumb coats, and shaping fondant decorations. Beginners might want to practice fondant techniques before attempting the full design.
- → Can I make the fondant decorations ahead of time?
Absolutely. Prepare black hair, white eyes, and red lips up to 24 hours in advance. Store flat between parchment paper in an airtight container at room temperature. This breaks up the work and makes decorating day much less stressful.
- → How do I achieve the deep red color in the layers?
Use gel food coloring rather than liquid for concentrated color without thinning the batter. Start with one tablespoon and add more as needed. Gel coloring provides vibrant red that liquid cannot achieve without affecting texture.
- → Why is my cream cheese buttercream too soft to work with?
Cream cheese contains more moisture than butter, which can make frosting softer. Chill the filled layers for 20 minutes before applying the final coat. If the frosting still feels too soft, refrigerate briefly and work in a cool room.
- → Can I substitute Swiss meringue buttercream for the cream cheese frosting?
Yes, Swiss meringue buttercream provides a lighter, silkier finish and holds up beautifully in warmer conditions. However, you'll lose that characteristic tang. Some bakers add a tablespoon of cream cheese powder to mimic the flavor profile.
- → How should I store the finished Betty Boop cake?
Keep refrigerated due to the cream cheese frosting and fondant decorations. Place in a cake box or cover loosely with plastic wrap, ensuring nothing touches the fondant details. Bring to room temperature 30 minutes before serving for optimal texture and flavor.