 Save
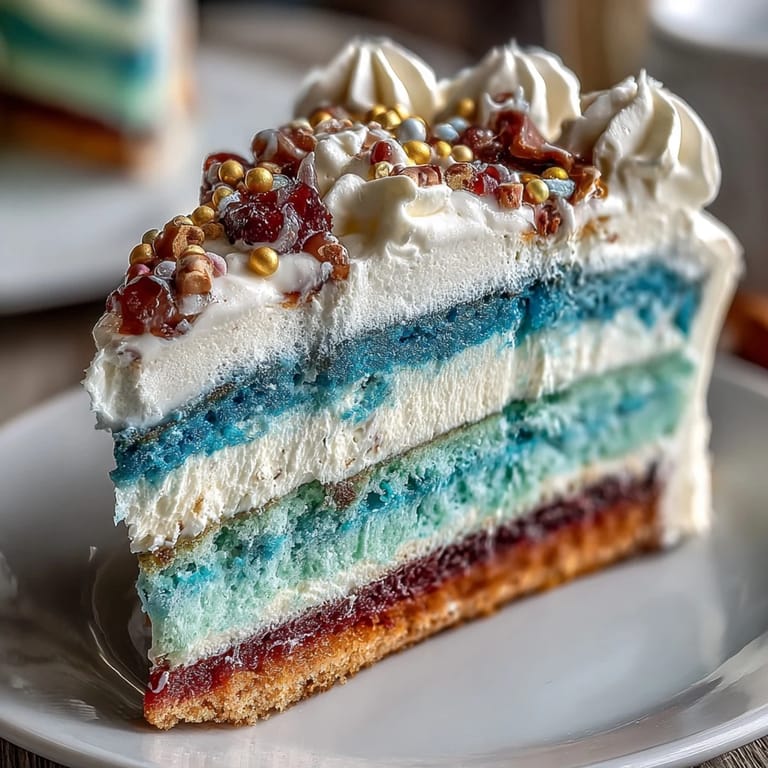
Save My cousin called me three weeks before graduation with a question that made me nervous: could I bake her cake? Not just any cake, but something that would match the school colors and actually look like it belonged in a magazine. I'd never attempted an ombre layer cake before, but watching her face light up when I described the gradient effect made me commit immediately. Standing in my kitchen at midnight, surrounded by bowls of buttercream and food coloring, I realized this wasn't really about perfecting a technique—it was about creating something that would sit at the center of her celebration.
I'll never forget my cousin's mom helping me transport the finished cake to the venue, both of us holding our breath at every bump in the road. When we set it down on the dessert table and she saw it from across the room, she actually gasped—not because it was perfect, but because it represented this moment she'd been waiting for. That's when I understood why people invest time in celebration cakes: they become part of the story.
Ingredients
- All-purpose flour: Use a brand you trust; it makes a difference in how smoothly the batter comes together.
- Baking powder: Check the expiration date because old baking powder won't lift the cake properly and you'll end up with a dense result that disappoints.
- Unsalted butter: Room temperature is non-negotiable—cold butter won't cream properly, and the cake will be tough instead of tender.
- Granulated sugar: This feeds the batter structure and creates that fine crumb you want when the cake is sliced.
- Large eggs: Room temperature eggs incorporate air more effectively and create a lighter texture throughout.
- Vanilla extract: Pure vanilla makes a noticeable difference in the flavor depth compared to imitation.
- Whole milk: Room temperature milk prevents the batter from becoming cold and seizing up when combined with the butter mixture.
- Gel food coloring: This is essential—liquid food coloring will thin out your batter and mess with the texture, but gel gives you vibrant color without changing the consistency.
- Egg whites: For the buttercream, room temperature egg whites whip up more efficiently and create that signature silky texture.
- Unsalted butter for buttercream: Softened and cubed helps it incorporate smoothly without overworking the mixture.
Tired of Takeout? 🥡
Get 10 meals you can make faster than delivery arrives. Seriously.
One email. No spam. Unsubscribe anytime.
Instructions
- Set up your workspace:
- Preheat your oven to 350°F and grease all four pans thoroughly, then line them with parchment paper so the cakes release cleanly. Having everything ready before you start mixing saves you from scrambling halfway through.
- Combine your dry ingredients:
- Whisk the flour, baking powder, and salt together in a medium bowl, breaking up any clumps in the baking powder. This ensures even leavening throughout all four layers.
- Cream butter and sugar:
- Beat the softened butter and sugar together on medium-high speed for about 3-4 minutes until it's pale, fluffy, and looks almost like soft serve ice cream. This is where you're building air pockets that will make the cake light and tender.
- Add eggs one at a time:
- Drop in each egg individually and beat well after each addition before moving to the next one. This prevents the batter from looking curdled and ensures the eggs emulsify properly.
- Alternate wet and dry ingredients:
- Start with a third of your flour mixture, then half the milk, then another third of flour, then the remaining milk, and finish with the last of the flour. Always start and end with flour to prevent the batter from becoming too wet.
- Divide and tint:
- Pour the batter equally into four bowls and add gel food coloring to each, starting with the lightest shade in one bowl and gradually increasing the intensity until you reach your darkest shade. The gradient from pale to deep is what creates that stunning ombre effect.
- Bake with confidence:
- Pour each color into its prepared pan and smooth the tops gently; bake for 22-25 minutes until a toothpick comes out clean. The cakes should spring back slightly when touched on top.
- Cool properly:
- Let them rest in the pans for 10 minutes, then turn them out onto wire racks to cool completely, which prevents them from breaking apart when you frost them.
- Prepare the Swiss meringue:
- Combine egg whites and sugar in a heatproof bowl and place it over a pot of simmering water, whisking constantly until the mixture reaches 160°F and the sugar dissolves completely. This heats the eggs safely while creating the foundation for silky buttercream.
- Whip to stiff peaks:
- Transfer the mixture to a stand mixer and whip on high speed for about 10 minutes until you have cool, glossy stiff peaks that stand up straight. This aeration is what makes the buttercream light and spreadable.
- Incorporate the butter:
- Add softened butter cubes gradually while mixing, waiting until each addition is fully incorporated before adding more; this prevents the mixture from looking greasy or separated. Add your vanilla and any coloring at the end.
- Layer with intention:
- Start with your darkest cake layer on a cake stand, spread it with buttercream, and continue stacking from darkest to lightest, rotating each layer to keep the cake level. This creates the visual gradient when sliced.
- Apply the crumb coat:
- Spread a thin layer of buttercream over the entire cake to seal in crumbs, then refrigerate for 20 minutes so your final frosting looks clean. This step separates amateur cakes from polished ones.
- Final frosting and decoration:
- Apply your final layer of buttercream, using an offset spatula or bench scraper to smooth it or create texture as desired; add pearls, toppers, or piped details that match your theme. Chill the finished cake until the frosting is set, then bring it to room temperature before serving for the best flavor.
 Save
Save Weeks after my cousin's graduation, she sent me a photo of the cake sitting on the dessert table, surrounded by people taking pictures of it. She told me her friends kept asking who the baker was, and when she said it was me, they looked genuinely shocked. That moment taught me that baking for celebrations isn't really about perfection—it's about showing up with intention and creating something beautiful enough to make people pause and smile.
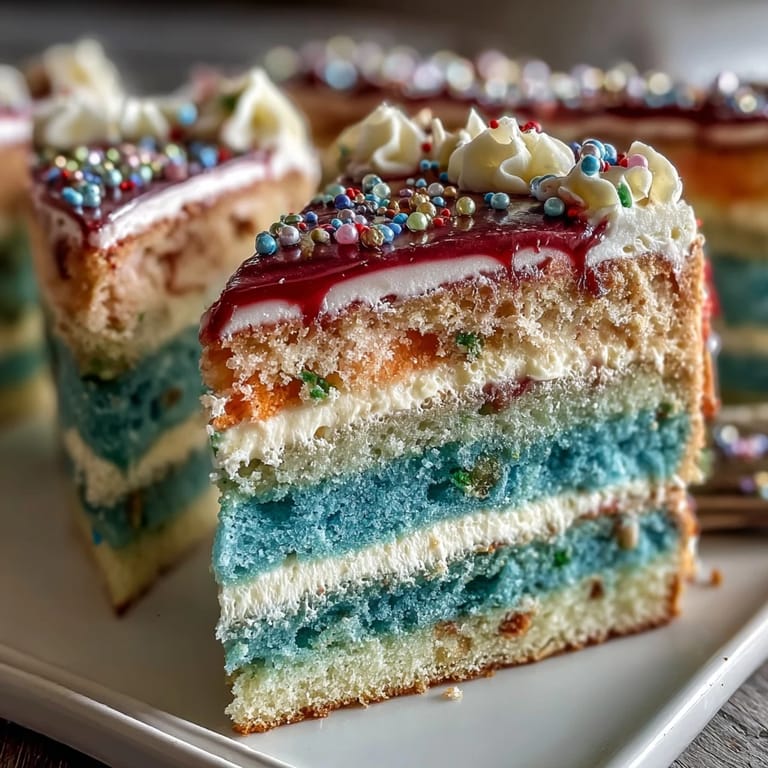
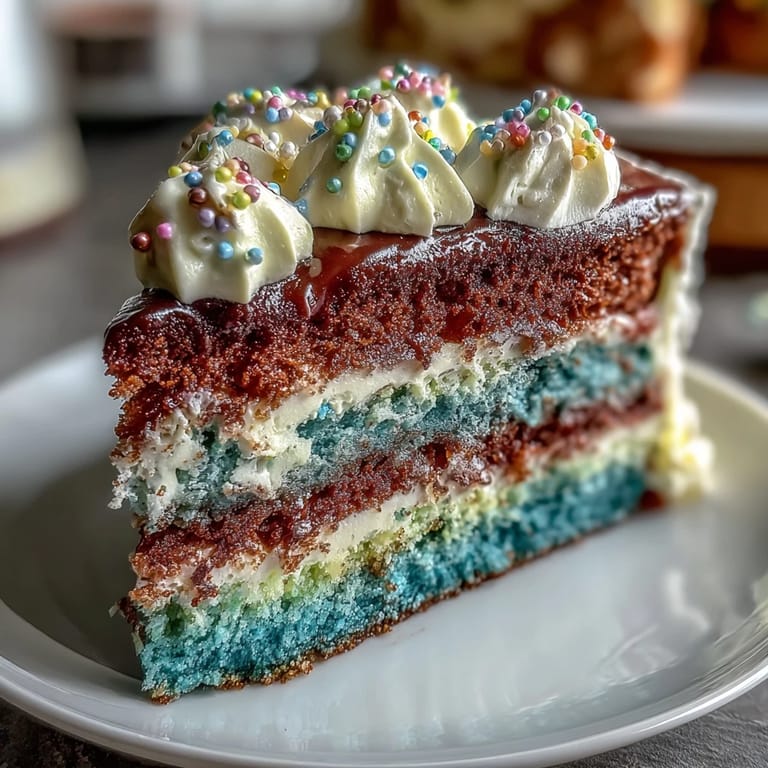
The Ombre Effect: Color Strategy
The magic of ombre cakes lives in the color progression, and this is where you get to be intentional about the visual story. School colors work beautifully, but I've also seen stunning gradients using navy to light blue, deep purple to lavender, or even chocolate brown to cream. Start by deciding your lightest and darkest shades, then mix the two middle colors by blending them together—this ensures a smooth, believable transition when the cake is sliced and served.
Why Swiss Meringue Matters
Regular American buttercream is easier, but Swiss meringue is the choice for celebration cakes because it handles the weight of multiple layers without deflating, stays stable at room temperature longer, and has that luxurious, almost mousse-like texture that makes people close their eyes when they take a bite. The heating step also eliminates any food safety concerns with raw eggs. Once you've made it once, you'll understand why pastry chefs choose it for their most important cakes.
Timing and Transport Tips
Build this cake the day before your event if you can—the flavors actually improve overnight and the structure becomes more stable for transport. Wrap the finished cake in plastic wrap and keep it in a cool room rather than the refrigerator if it's going to stay wrapped for a while, since condensation can make the frosting weep. If you're traveling with it, place the cake on a non-slip mat in your vehicle and drive slowly, avoiding highways and sharp turns.
- A turntable makes frosting dramatically easier and more even, so invest in one if you're making celebration cakes regularly.
- If your buttercream looks too soft while working, chill it for 10-15 minutes and it will firm up without becoming difficult to spread.
- Bring the cake to room temperature about an hour before serving so the layers cut cleanly and the flavors shine through instead of tasting muted from the cold.
 Save
Save This cake became my go-to for anyone marking a major milestone because it feels special without demanding that you be a professionally trained baker. Make it once and you'll understand the technique well enough to customize it for weddings, promotions, or simply because someone deserves a cake that's as beautiful as their moment.
Recipe Q&A
- → How do I achieve the ombre effect between cake layers?
Divide the batter evenly and add increasing amounts of gel food coloring to each part. Pour into pans from lightest to darkest to create a smooth gradient.
- → What is the best way to make a smooth buttercream frosting?
Whip the Swiss meringue buttercream until stiff peaks form and cool completely before gradually adding softened butter to ensure a smooth, creamy texture.
- → Can I prepare the cake layers in advance?
Yes, bake the layers ahead, wrap them to retain moisture, and assemble with frosting on the day of serving for best results.
- → What decorations pair well with this layered cake?
Edible pearls, themed toppers like caps or diplomas, and piped buttercream details enhance the cake's celebratory appearance.
- → How should I store the finished cake?
Chill the cake until set, then keep refrigerated. Bring to room temperature before serving to enjoy optimal texture and flavor.