 Save
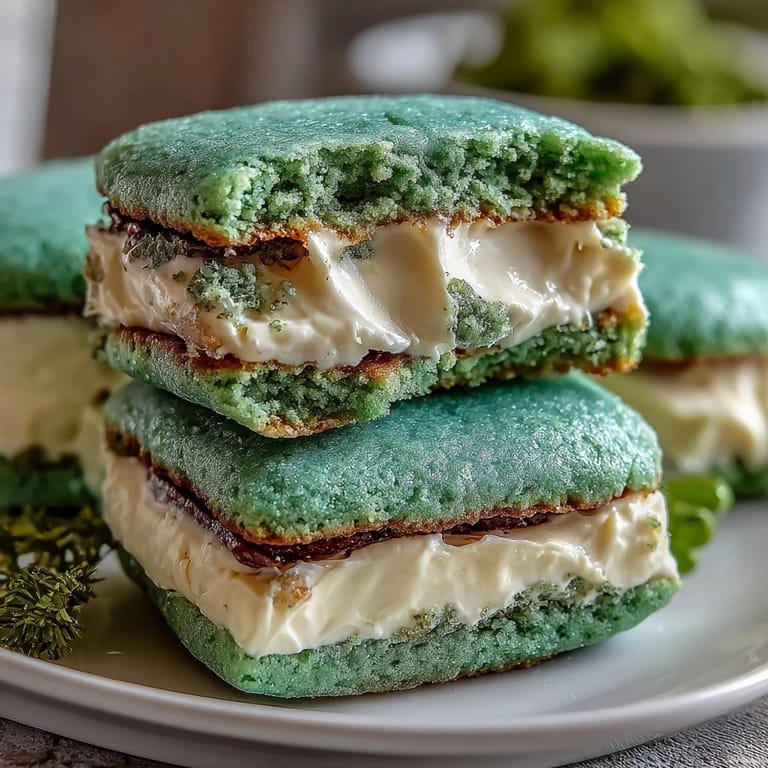
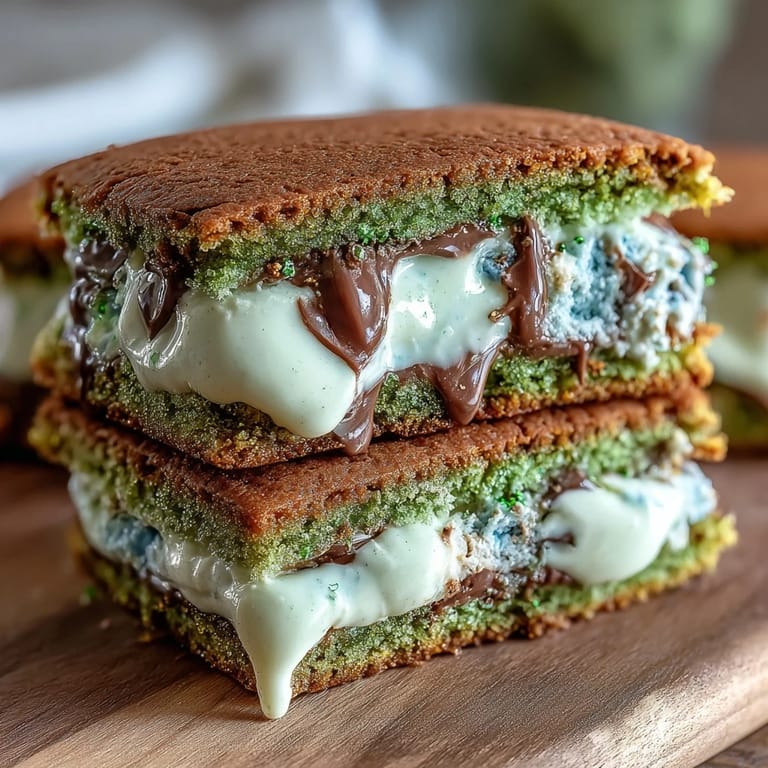
Save My neighbor knocked on the door last March holding a plate of these emerald-green sandwich cookies dusted in sparkle, and I couldn't help but ask for the recipe immediately. She laughed and said they were her St. Patrick's Day secret weapon—soft enough to practically melt on your tongue, but sturdy enough to handle that cloud of vanilla frosting in the middle. The first bite was pure magic: buttery cookie, creamy filling, and that satisfying crunch of sanding sugar between your teeth. Since then, I've made them every year, sometimes sneaking a batch into my coworker's desk the week before the holiday just to see her face light up.
I'll never forget making these with my daughter when she was six—she insisted on rolling every single dough ball herself, leaving green fingerprints on everything including the kitchen counter, the dog, and somehow my hair. We laughed so hard when she declared the cookies "perfect for the leprechauns," and now that's her official name for them. The fact that she could help with nearly every step, from mixing to decorating, makes this recipe feel special in a way that goes beyond just taste.
Ingredients
- All-purpose flour (2 1/2 cups): This is your foundation—make sure it's fresh and not packed down when you measure, or your cookies will be dense and tough.
- Baking powder (1/2 tsp): Just enough to give these cookies a gentle lift without making them cakey.
- Salt (1/4 tsp): A pinch of salt makes the vanilla and butter flavors pop and balances the sweetness beautifully.
- Unsalted butter (1 cup for dough): Room temperature is non-negotiable here—cold butter won't cream properly and you'll end up with dense cookies.
- Granulated sugar (1 cup): This creates structure and that slight crispness at the edges while keeping the center soft.
- Large egg: Room temperature eggs mix in more smoothly and create a better texture than cold ones straight from the fridge.
- Pure vanilla extract (2 tsp): The backbone of flavor—don't skimp on quality here, it makes a real difference.
- Almond extract (1/2 tsp, optional): This adds a subtle sophistication that makes people ask what the secret ingredient is.
- Green gel food coloring: Gel holds its color better than liquid and won't thin out your dough like water-based coloring would.
- Green sparkling sugar (1/2 cup): Look for this in the baking aisle around the holidays—regular sugar just won't give you that festive shimmer.
- Unsalted butter for frosting (1/2 cup): Softened butter whips to fluffy perfection and tastes less greasy than salted varieties in frosting.
- Powdered sugar (1 3/4 cups): Sift this before measuring to break up lumps and get a smooth frosting without grainy spots.
- Milk (1 1/2 tbsp): Whole milk creates a creamier frosting than skim, though any will work in a pinch.
- Vanilla extract for frosting (1 tsp): Echoes the cookie flavor and ties the whole sandwich together.
- Salt pinch: A tiny whisper of salt in the frosting prevents it from tasting one-dimensionally sweet.
Tired of Takeout? 🥡
Get 10 meals you can make faster than delivery arrives. Seriously.
One email. No spam. Unsubscribe anytime.
Instructions
- Preheat and prepare:
- Set your oven to 350°F and line baking sheets with parchment paper so nothing sticks and cleanup becomes easy. Having everything ready before you start mixing is the move that prevents frantic searching mid-bake.
- Combine dry ingredients:
- Whisk flour, baking powder, and salt together in a bowl and set it aside. This distributes the leavening evenly so you don't end up with dense pockets in your cookies.
- Cream butter and sugar:
- In a large bowl, beat the softened butter and granulated sugar together for about 2 to 3 minutes until it looks pale and fluffy. You'll feel and see the transformation as the mixture lightens in color and texture—that's when you know the air is incorporated properly.
- Add wet ingredients:
- Beat in the egg, vanilla extract, and almond extract if using, mixing until everything is smooth and combined. The mixture should smell incredibly vanilla-forward at this point.
- Color your dough:
- Add your green gel food coloring a little at a time, beating after each addition until you reach your desired shade of green. I usually go for a medium Irish green, but the beauty is you can adjust it to your taste.
- Mix in dry ingredients:
- Gradually add the flour mixture to the wet ingredients, stirring just until a soft dough forms. Overmixing at this stage is the enemy—you want tender cookies, not tough ones.
- Scoop and coat:
- Using a tablespoon or small cookie scoop, portion out the dough into balls and roll each one in the green sparkling sugar. The sugar clings better to the dough while it's still soft, giving you that gorgeous sparkly coating.
- Flatten and space:
- Place the balls about 2 inches apart on your prepared baking sheets, then gently flatten each one with the palm of your hand. This helps them bake evenly and gives you a nice flat surface for frosting later.
- Bake to perfection:
- Bake for 9 to 11 minutes—the edges should look set and slightly darker while the centers still feel soft to the touch. Trust me on this: pulling them out a minute or two early is better than overbaking, because they continue cooking on the warm sheet and will firm up as they cool.
- Cool completely:
- Let the cookies sit on the baking sheet for a minute, then transfer them to a wire rack. They need to cool completely before frosting, or the frosting will melt and slide right off.
- Make the frosting:
- Beat the softened butter in a bowl until it's creamy and pale, then gradually add the sifted powdered sugar, milk, vanilla, and salt. Beat until smooth and fluffy—if it looks too stiff, add another splash of milk.
- Assemble sandwiches:
- Spread or pipe a generous dollop of frosting onto the flat side of half your cooled cookies, then press the remaining cookies on top to create sandwiches. If you want extra sparkle, you can roll the frosting-exposed sides in more sanding sugar before it sets.
 Save
Save There's something magical about watching someone bite into one of these cookies and see their whole face light up when they hit that sweet, creamy center. My coworker Sarah now makes them every year and brings them to our office party, and I like to think I started a tradition that'll keep going long after this year passes.
The Secret to Soft Centers
The trick to keeping these cookies soft and not cake-like is understanding that perfect window of baking time. I learned this after burning a batch while chatting on the phone—now I set a timer and actually listen for it. The cookies will feel barely set on top when you pull them out, almost fragile, but that's exactly what you want because they firm up as they cool.
Why Gel Food Coloring Changes Everything
The first time I made these, I grabbed liquid food coloring from my pantry and ended up with a sticky, pale green mess that I had to throw out. A baker friend explained that gel coloring is concentrated and oil-based, so it adds vibrant color without adding water that would ruin the dough texture. Since switching to gel, my cookies come out consistently beautiful every single time.
Storage and Make-Ahead Magic
These cookies stay wonderfully tender in an airtight container at room temperature for up to three days, and I've found that day two is actually when they taste best as the flavors meld together. You can even bake the plain cookies a day or two ahead and frost them the day you're serving, which takes a lot of pressure off if you're making them for a party or gathering.
- Store unfrosted cookies in an airtight container and frosted sandwiches in a single layer so the frosting doesn't get squished.
- If you're feeling fancy, add a drop or two of peppermint extract to the frosting for a festive twist that pairs beautifully with the vanilla.
- Don't skip the sifting step for powdered sugar—it genuinely makes the frosting smoother and more professional-looking.
 Save
Save These cookies have become my St. Patrick's Day signature, and there's nothing quite like the joy of sharing something homemade that's actually easy to pull off. Every year I make a batch, and every year someone asks for the recipe—and now you have it.
Recipe Q&A
- → What gives the cookies their green color?
Green gel food coloring is mixed into the dough to achieve a vibrant, festive green without altering the texture.
- → How is the sparkling sugar applied?
Dough balls are rolled in green sparkling sugar before baking to create a sparkling, textured surface.
- → What flavor fills the cookie sandwiches?
The filling is a creamy vanilla frosting made with butter, powdered sugar, milk, and vanilla extract.
- → Can the almond extract be omitted?
Yes, the almond extract is optional and can be left out for a pure vanilla flavor.
- → How should these treats be stored?
Store in an airtight container at room temperature for up to three days to maintain freshness.