 Save
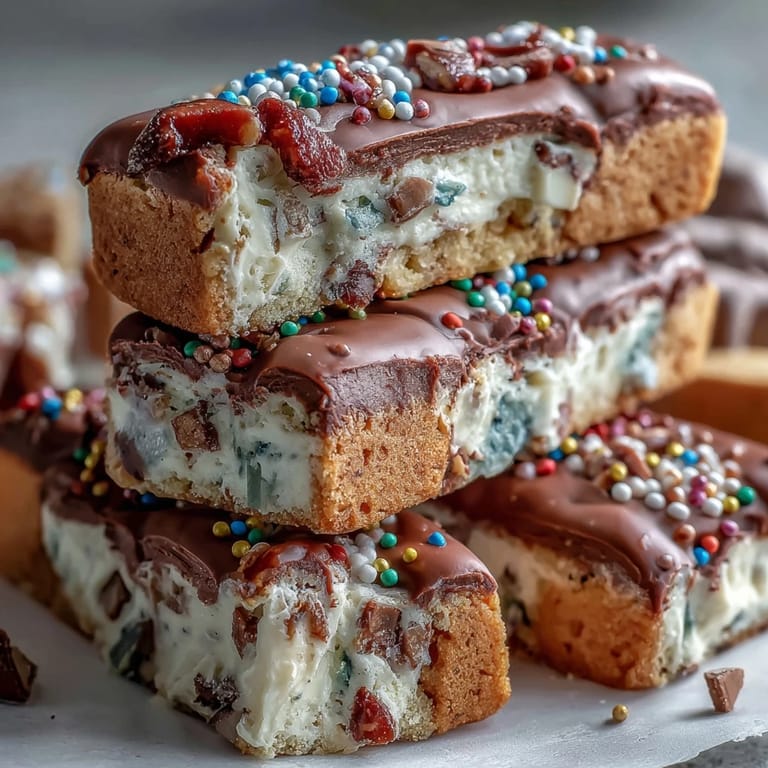
Save My kitchen was a mess the morning I first attempted these rainbow bars, flour dusting the counter after I'd knocked over the bag reaching for vanilla extract. But something about the vibrant sprinkles tumbling into the batter felt like pure joy, and watching them bake into these buttery, golden squares made me realize that sometimes the best celebrations are the ones that make your kitchen look like a confetti bomb went off. These bars became my go-to for St. Patrick's Day gatherings, though honestly, I make them year-round now because life shouldn't need an excuse for this much color and sweetness.
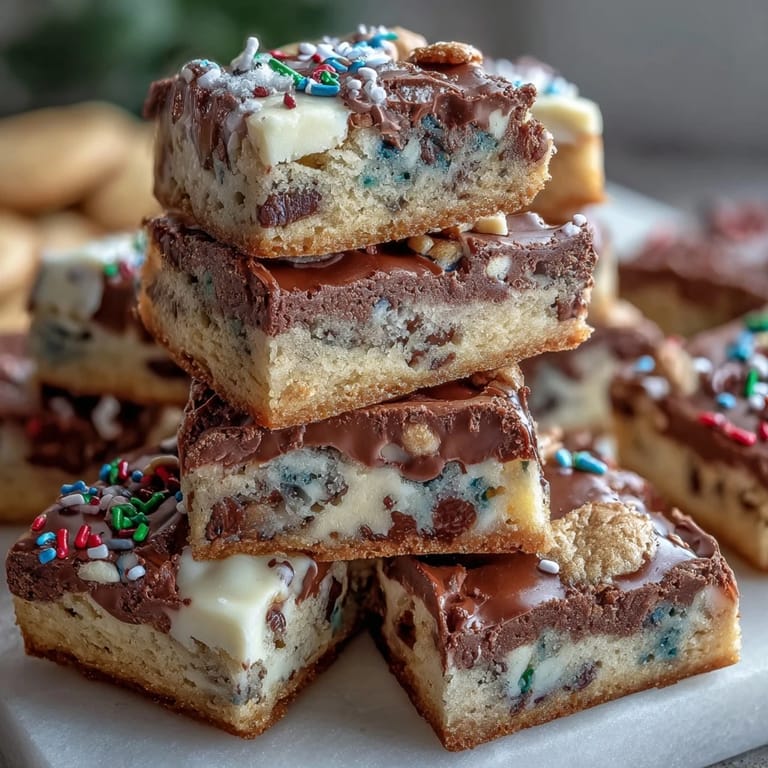
I brought these to a St. Patrick's Day potluck last year thinking they'd be the quiet dessert nobody remembered, but my friend Sarah grabbed one, took a bite, and immediately asked if I could leave the whole pan. Watching people's faces light up when they bit into that unexpected sweetness of white chocolate mixed with vanilla buttery dough—that's when I knew these bars had earned their place at every celebration in my kitchen.
Ingredients
- All-purpose flour (2 cups): This is your foundation, and measuring it by weight keeps the texture consistent; if you scoop directly from the bag, you'll pack in too much.
- Baking powder (1/2 teaspoon): Just enough to give these bars a tender crumb without making them too cake-like.
- Salt (1/4 teaspoon): A tiny pinch that makes the sweetness sing and balances everything together.
- Unsalted butter (3/4 cup, melted and cooled): The melted butter creates that dense, chewy texture that makes these bars addictive; cooling it first prevents the eggs from scrambling.
- Granulated sugar (1 cup) and light brown sugar (1/2 cup): Together they create depth and chewiness that plain white sugar alone can't achieve.
- Large eggs (2): These bind everything and add richness without needing extra leavening agents.
- Pure vanilla extract (2 teaspoons): Don't skip or use imitation here; it's what makes people ask what that wonderful flavor is.
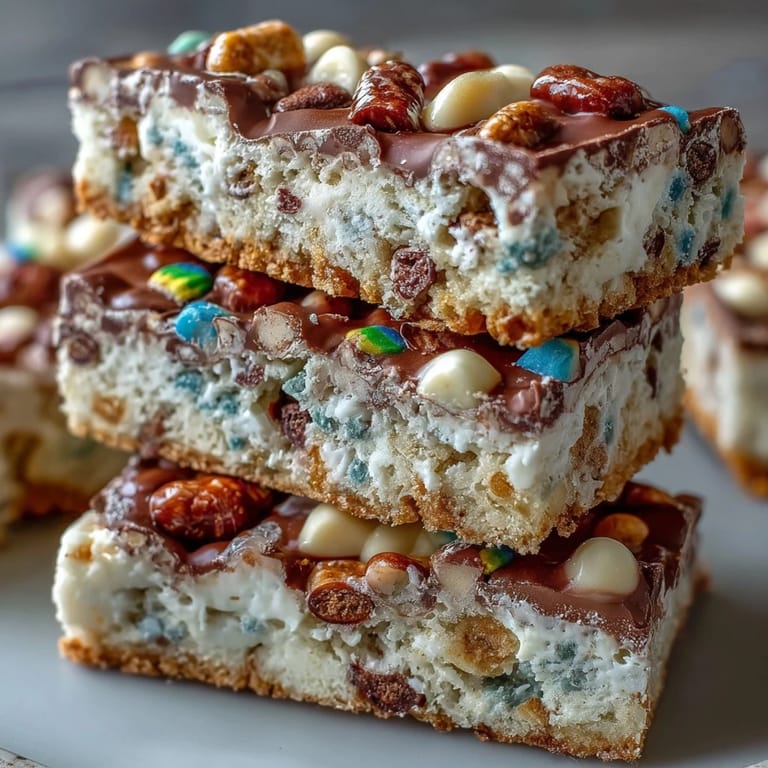
- White chocolate chips (3/4 cup): They soften slightly during baking, creating pockets of sweetness throughout.
- Rainbow sprinkles (1/2 cup, divided): Mix them into the batter and scatter on top for maximum visual impact and texture contrast.
Tired of Takeout? 🥡
Get 10 meals you can make faster than delivery arrives. Seriously.
One email. No spam. Unsubscribe anytime.
Instructions
- Prep your pan with care:
- Line your 9x9-inch pan with parchment paper, letting the edges hang over so you can lift the whole batch out once cooled. This saves you from the frustration of trying to scrape bars out of a pan corner.
- Build your dry team:
- Whisk flour, baking powder, and salt in a medium bowl and set it aside; this distributes the leavening evenly throughout so you don't get dense pockets later.
- Cream the wet ingredients:
- In your large bowl, whisk together the cooled melted butter and both sugars until the mixture looks smooth and slightly glossy, then add eggs and vanilla and keep whisking until you don't see any streaks of egg white. This step takes about two minutes and builds the structure of your bars.
- Fold gently:
- Using a spatula, fold the dry ingredients into the wet mixture in a few additions, stopping as soon as you don't see flour streaks anymore; overmixing develops gluten and makes bars tough. You want it to look lazy and casual, not vigorous and athletic.
- Add the good stuff:
- Stir in the white chocolate chips and about one-third cup of the sprinkles, reserving the rest for topping. This distributes the sweetness and color throughout rather than just at the edges.
- Spread and top:
- Press the batter evenly into your prepared pan using an offset spatula or the back of a wooden spoon, then scatter the remaining sprinkles across the top. The sprinkles will sink slightly as they bake, which is exactly what you want.
- Bake with patience:
- Bake at 350°F for 25 to 28 minutes until the edges turn golden brown and a toothpick inserted into the center comes out with just a few moist crumbs clinging to it. Overbaking makes them dry, so start checking at the 25-minute mark.
- Cool completely:
- Let them rest in the pan on a wire rack until they reach room temperature, which firms up the structure so they cut into clean bars instead of crumbling. This takes patience but is absolutely worth it.
 Save
Save There's something magical about watching kids' eyes go wide when they bite into a bar and that white chocolate melts on their tongue. These bars stopped being just dessert and became the thing people remember about the gathering itself.
Why These Bars Feel Special
There's a reason these bars outshine other brownies and blondies at celebrations—they hit multiple sensory notes at once. The buttery, vanilla-forward base is rich enough to feel indulgent but light enough that you can eat two without feeling overwhelmed, and the white chocolate creates pockets of sweetness that surprise you with each bite. The sprinkles add both visual excitement and a little crunch that keeps the texture interesting.
Storage and Keeping
Once they're completely cool, stack them in an airtight container at room temperature where they'll stay soft and delicious for up to four days. I've learned the hard way that leaving them out uncovered causes the edges to dry out while the center stays chewy, creating an uneven texture you don't want.
Ways to Make Them Your Own
While these bars are perfect as-is, I've had fun experimenting with variations depending on the season and mood. You can swap the white chocolate chips for milk or dark chocolate, add a drizzle of melted white chocolate across the top once they've cooled, or press small shamrock-shaped candies into the batter before baking for extra festivity. The base recipe is forgiving enough that it takes whatever additions you want to throw at it.
- Substitute semisweet or milk chocolate chips if you want a different flavor profile.
- A sprinkle of sea salt on top before baking adds sophistication and makes the sweetness pop.
- Store in an airtight container at room temperature for up to four days, or freeze them for up to a month.
 Save
Save These bars have become my answer to the question of what to bring when you want to add a little brightness to someone's day. They're foolproof enough for a beginner and festive enough to make anyone smile.